Create a classroom
How to set up your first Classmoji classroom
Before you start
Section titled “Before you start”You need to be the admin of a Github organization. If that sentence stressed you out, don’t worry. You can make one in about 30 seconds.
Already running your course on Github Classroom? You can import it instead and bring your assignments, roster, and grades along.
Step 1: Basic info
Section titled “Step 1: Basic info”Head to app.classmoji.io and click Create new class.
Fill in the following:
- Github organization: only orgs where you’re admin with the Classmoji app installed will appear. If you haven’t installed the app yet, you can do it directly from the dropdown.
- Classroom name: something like “CS 101” or “Intro to Systems”
- Term and year: Fall, Spring, Summer, or Winter
A slug is auto-generated from your inputs (e.g. cs-101-25f). This becomes the classroom’s URL and can’t be changed later. Pick something readable — you’ll be typing it all semester.
Step 2: Import repositories (optional)
Section titled “Step 2: Import repositories (optional)”If you’ve run this class before, you can pull repositories from a previous classroom. Toggle the import on, pick a source classroom, and select which repositories to bring over. Deadlines come in blank so you can set new ones without touching everything else.
A few things to know:
- Deadlines are stripped on import
- Repositories and quizzes start unpublished, so nothing is visible to students right away
If this is your first rodeo, skip it.
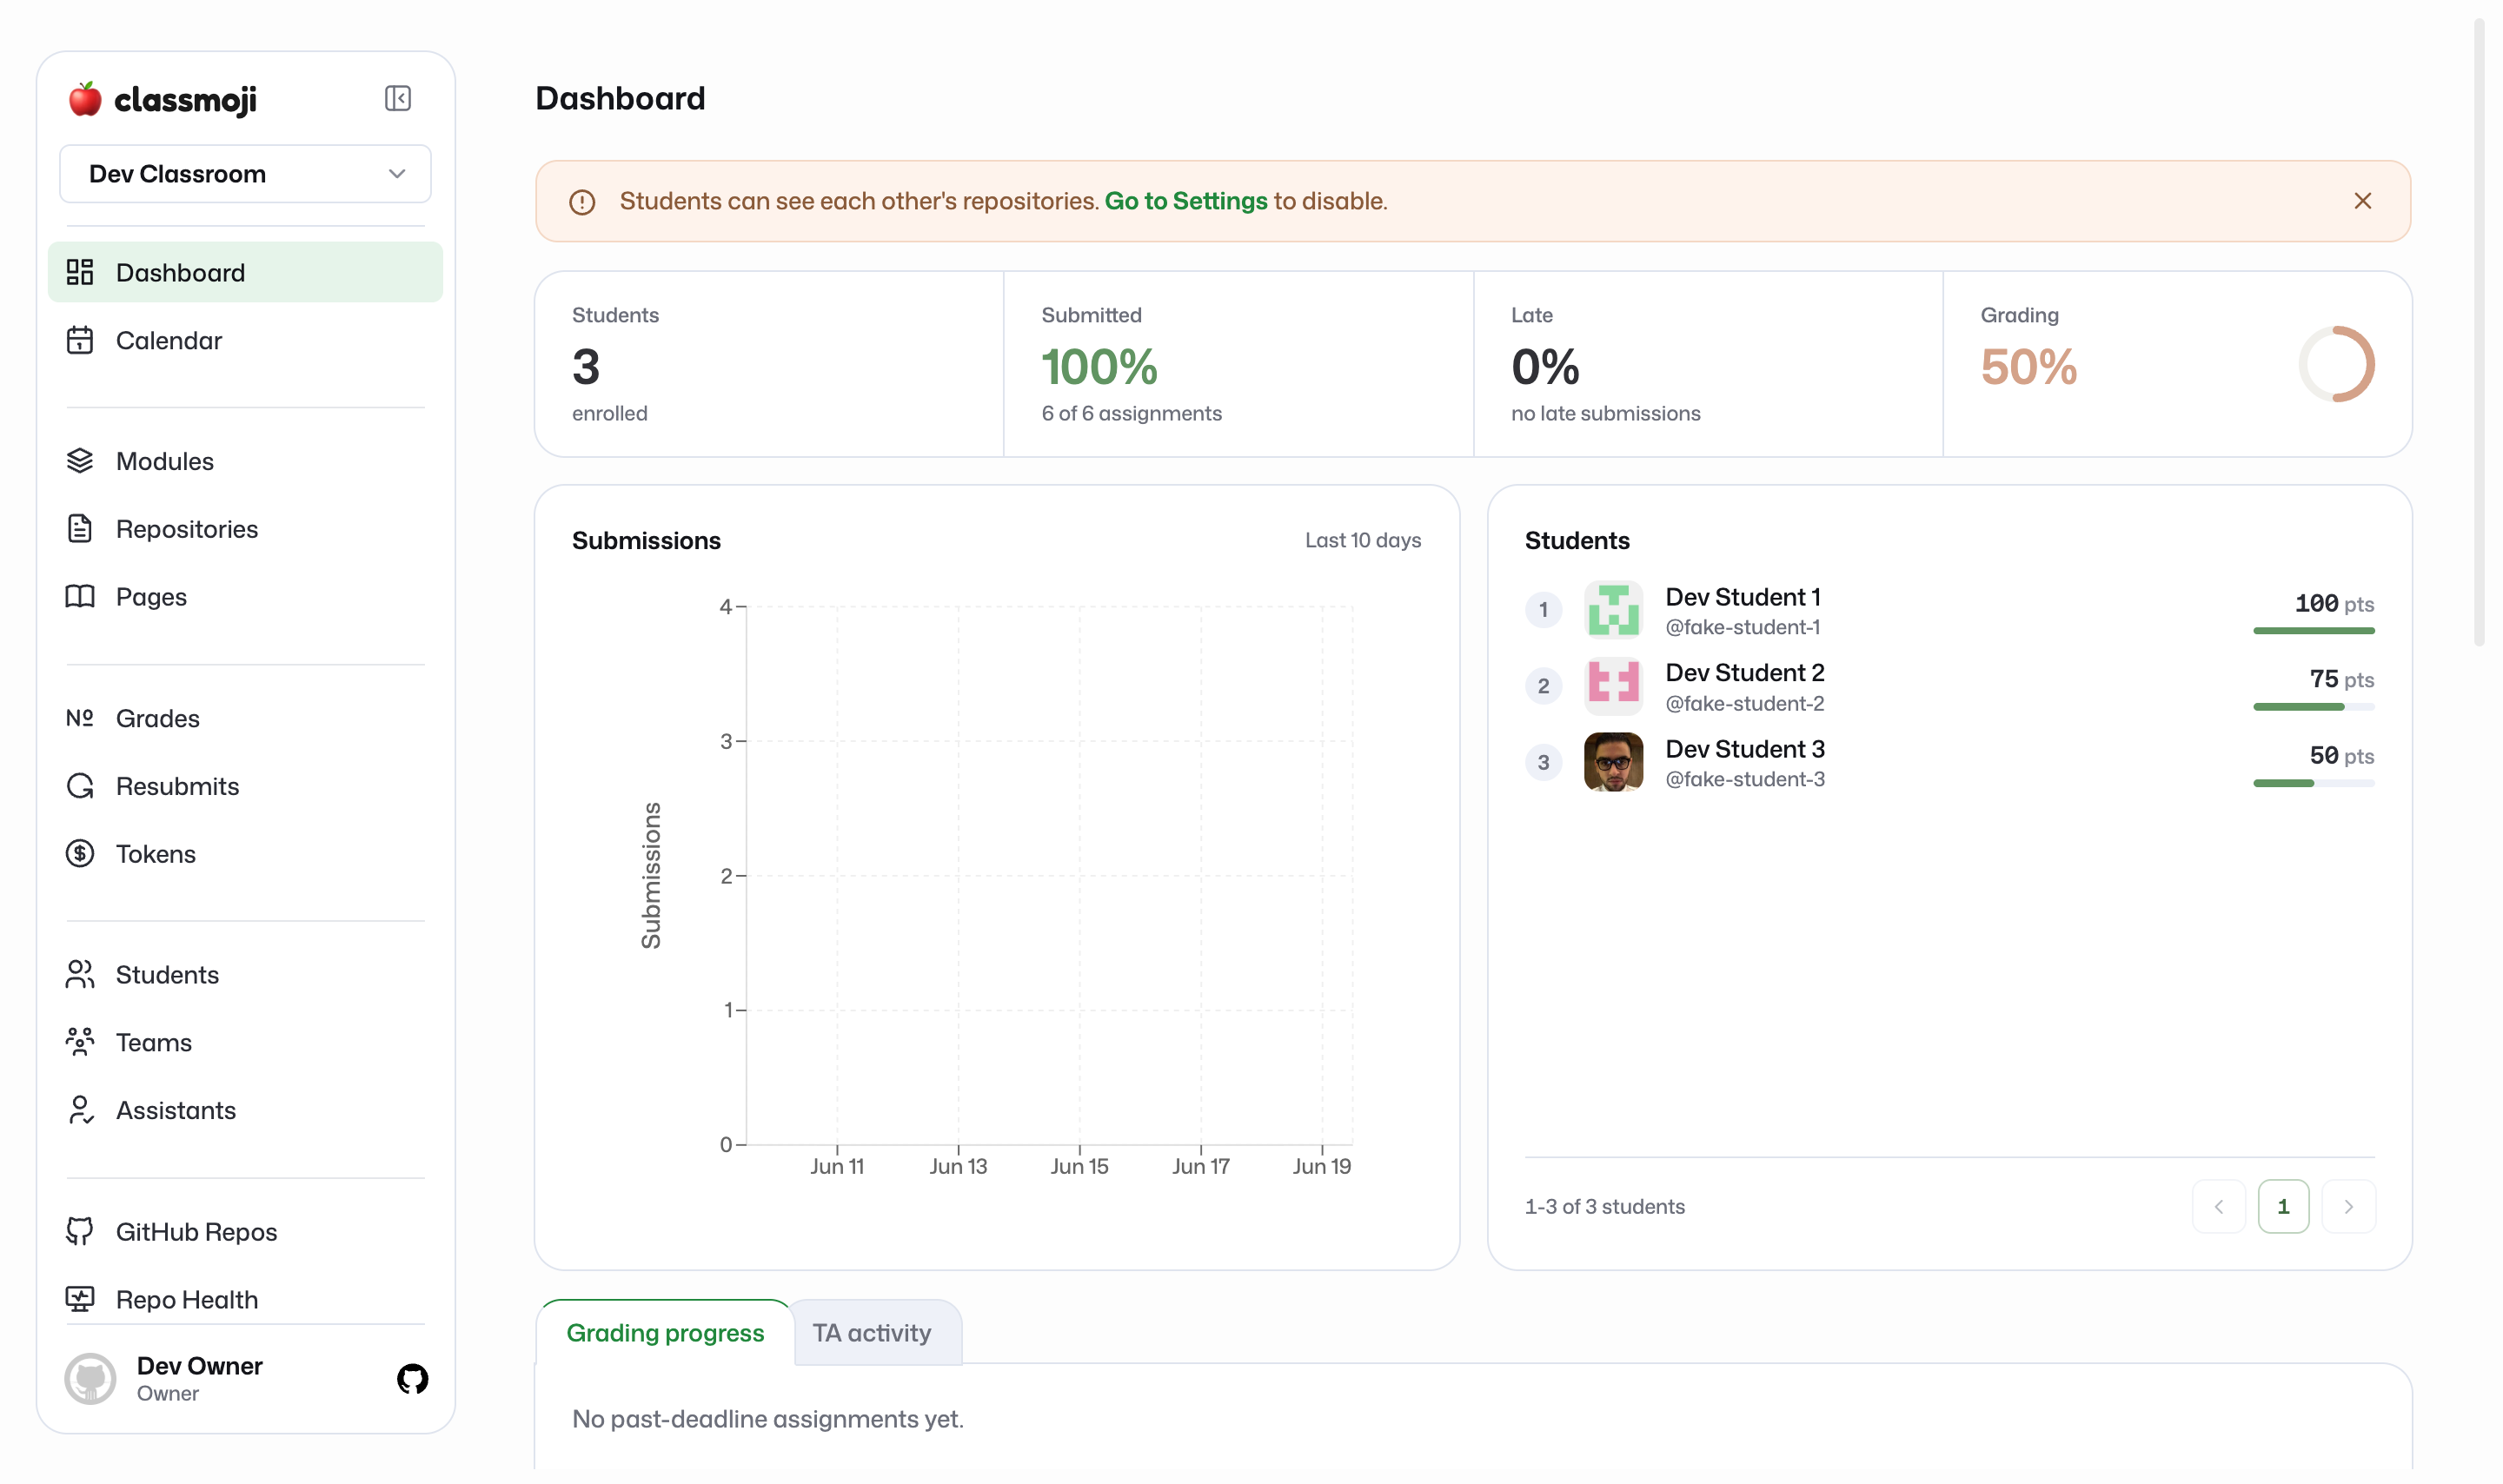
Step 3: Review and create
Section titled “Step 3: Review and create”Give everything a final look and hit Create classroom. You’ll land on the admin dashboard.