Local development
Run Classmoji on your machine and contribute code.
Minimal setup covers most contributions. Full setup is only needed if you’re working on GitHub-integrated features like repository sync, webhooks, or background jobs.
Prerequisites
Section titled “Prerequisites”- Node.js 22+
- Docker (if using the Docker database option)
- A GitHub account
1. Fork and clone the repo
Section titled “1. Fork and clone the repo”Go to github.com/classmoji/classmoji, fork it (how to fork a repo), then clone your fork:
git clone https://github.com/YOUR_USERNAME/classmoji.gitcd classmojigit remote add upstream https://github.com/classmoji/classmoji.gitnpm installAdding upstream lets you pull in future changes from the main repo with git fetch upstream.
2. Configure environment variables
Section titled “2. Configure environment variables”cp .env.example .env3. Database setup
Section titled “3. Database setup”Choose one option. Both work with the rest of the setup.
Method 1: Docker
Section titled “Method 1: Docker”No account needed, runs fully offline. Install Docker if you don’t have it.
npm run db:startThe DATABASE_URL in .env.example already points to the Docker instance — no changes needed.
Method 2: Neon
Section titled “Method 2: Neon”Neon is a serverless PostgreSQL platform with a generous free tier. It’s a great option if you can’t run Docker or want to visualize your database — Neon provides a built-in UI where you can browse tables and run queries directly in the browser.
- Sign up at neon.com and create a new project
- On the project dashboard, click the Connection string card
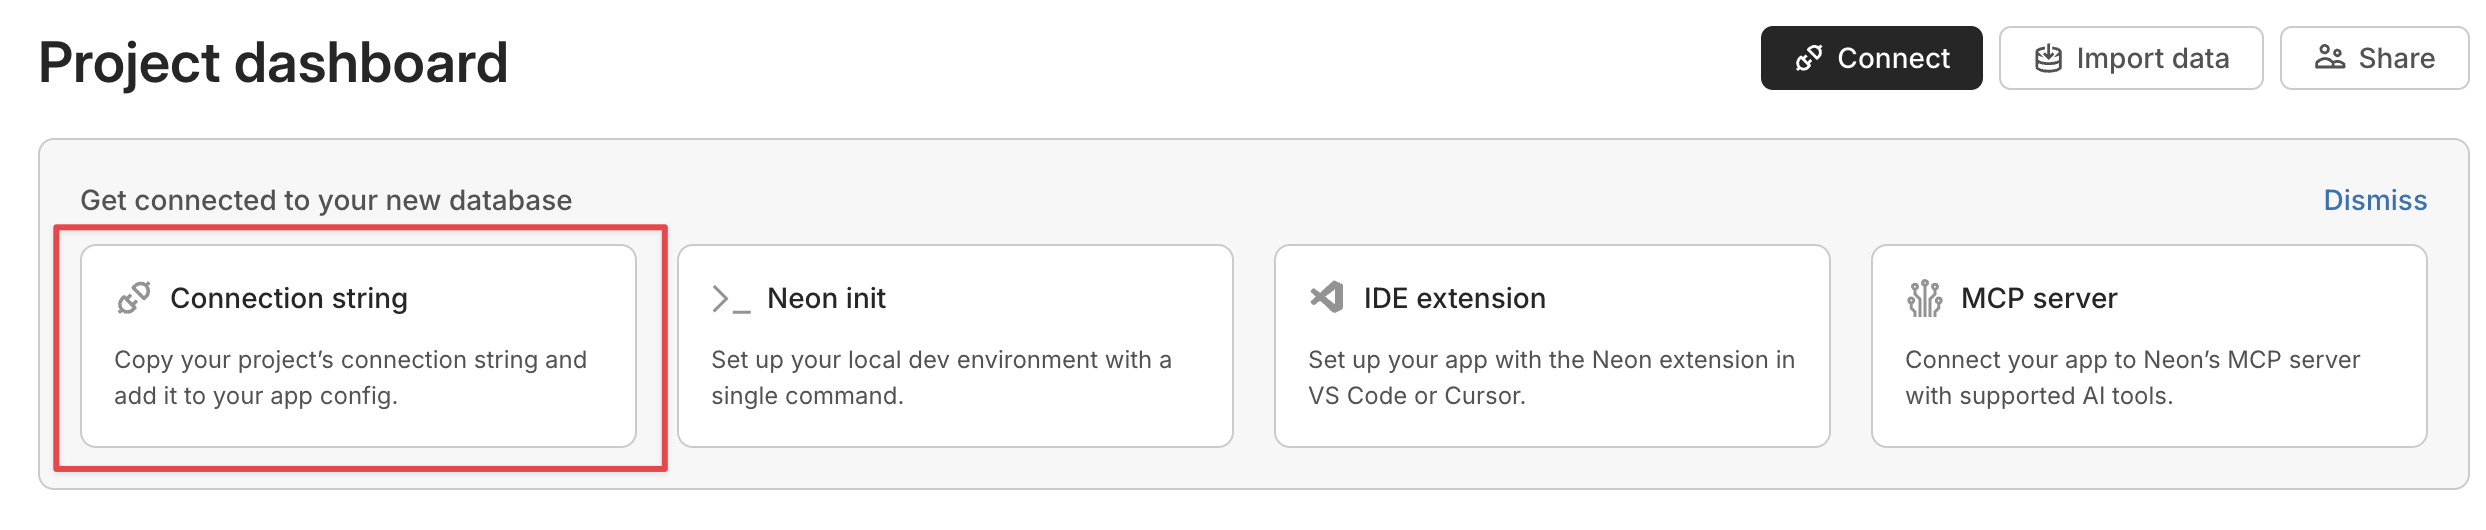
- Copy the connection string and paste it as
DATABASE_URLin your.env
Apply migrations and seed
Section titled “Apply migrations and seed”Regardless of which option you chose:
npm run db:deploy # applies migrationsnpm run db:seed # seeds dev classroom and fake users4. Run the app
Section titled “4. Run the app”To start the webapp service:
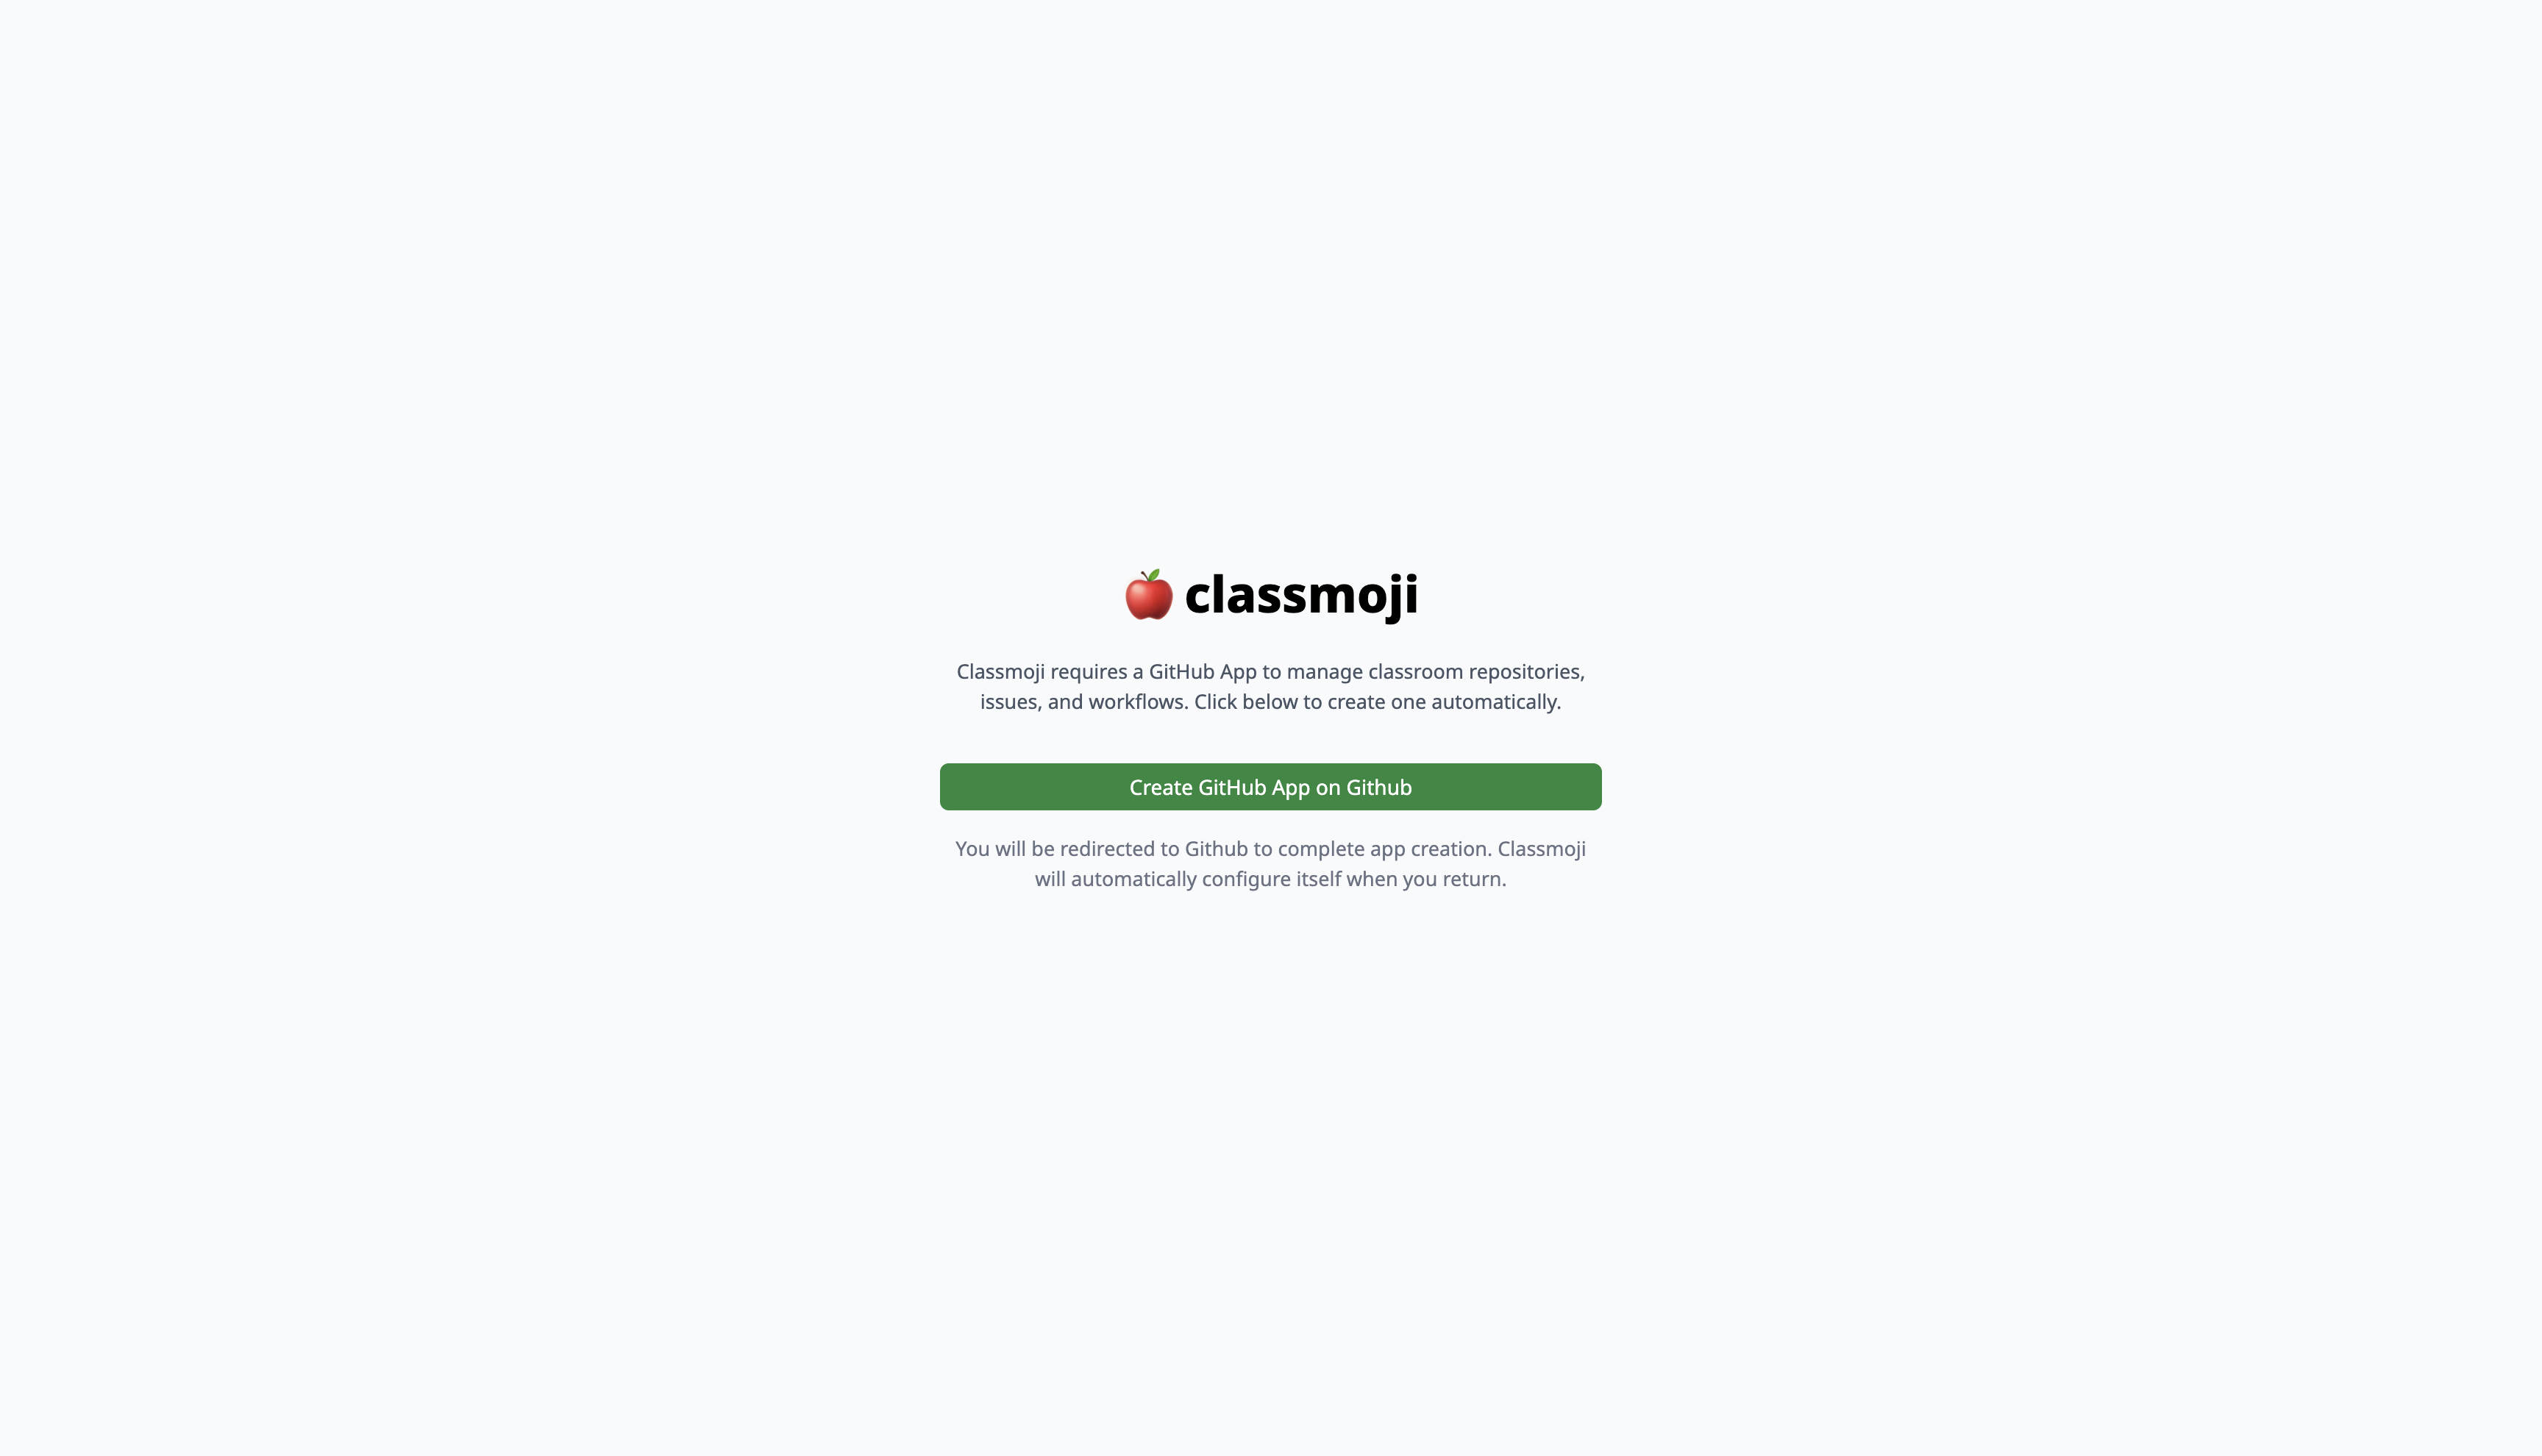
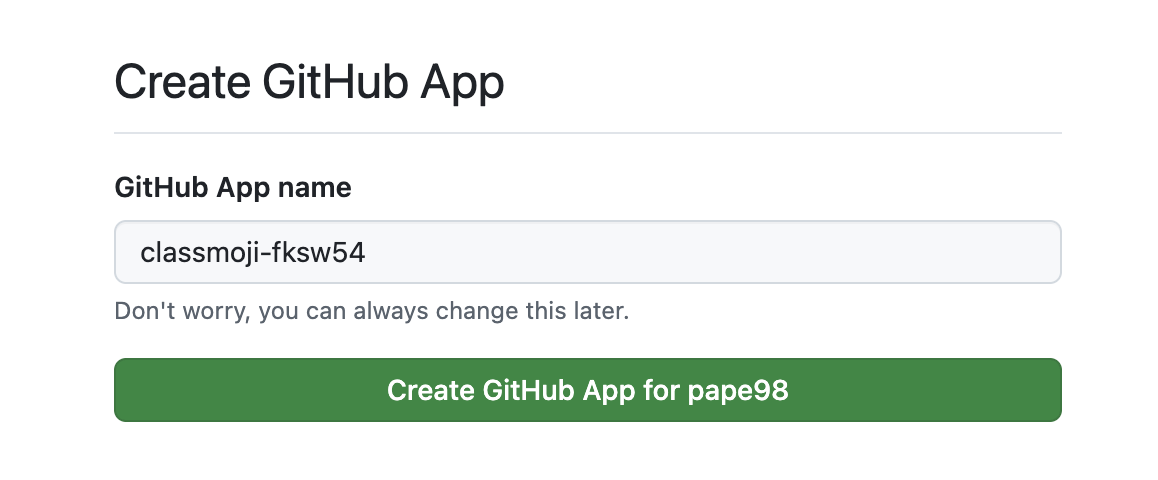
npm run web:devOpen http://localhost:3000 — you’ll be taken to a setup wizard because SETUP_GITHUB_APP=true is set in your .env. Click Create GitHub App on Github, confirm on GitHub, and you’ll be redirected back.
After the wizard completes, the GitHub App values are automatically written to your .env and the setup flag is cleared. Restart the dev server as prompted, then sign in with your GitHub account. You’ll be automatically added to the dev classroom as Owner, TA, and Student.
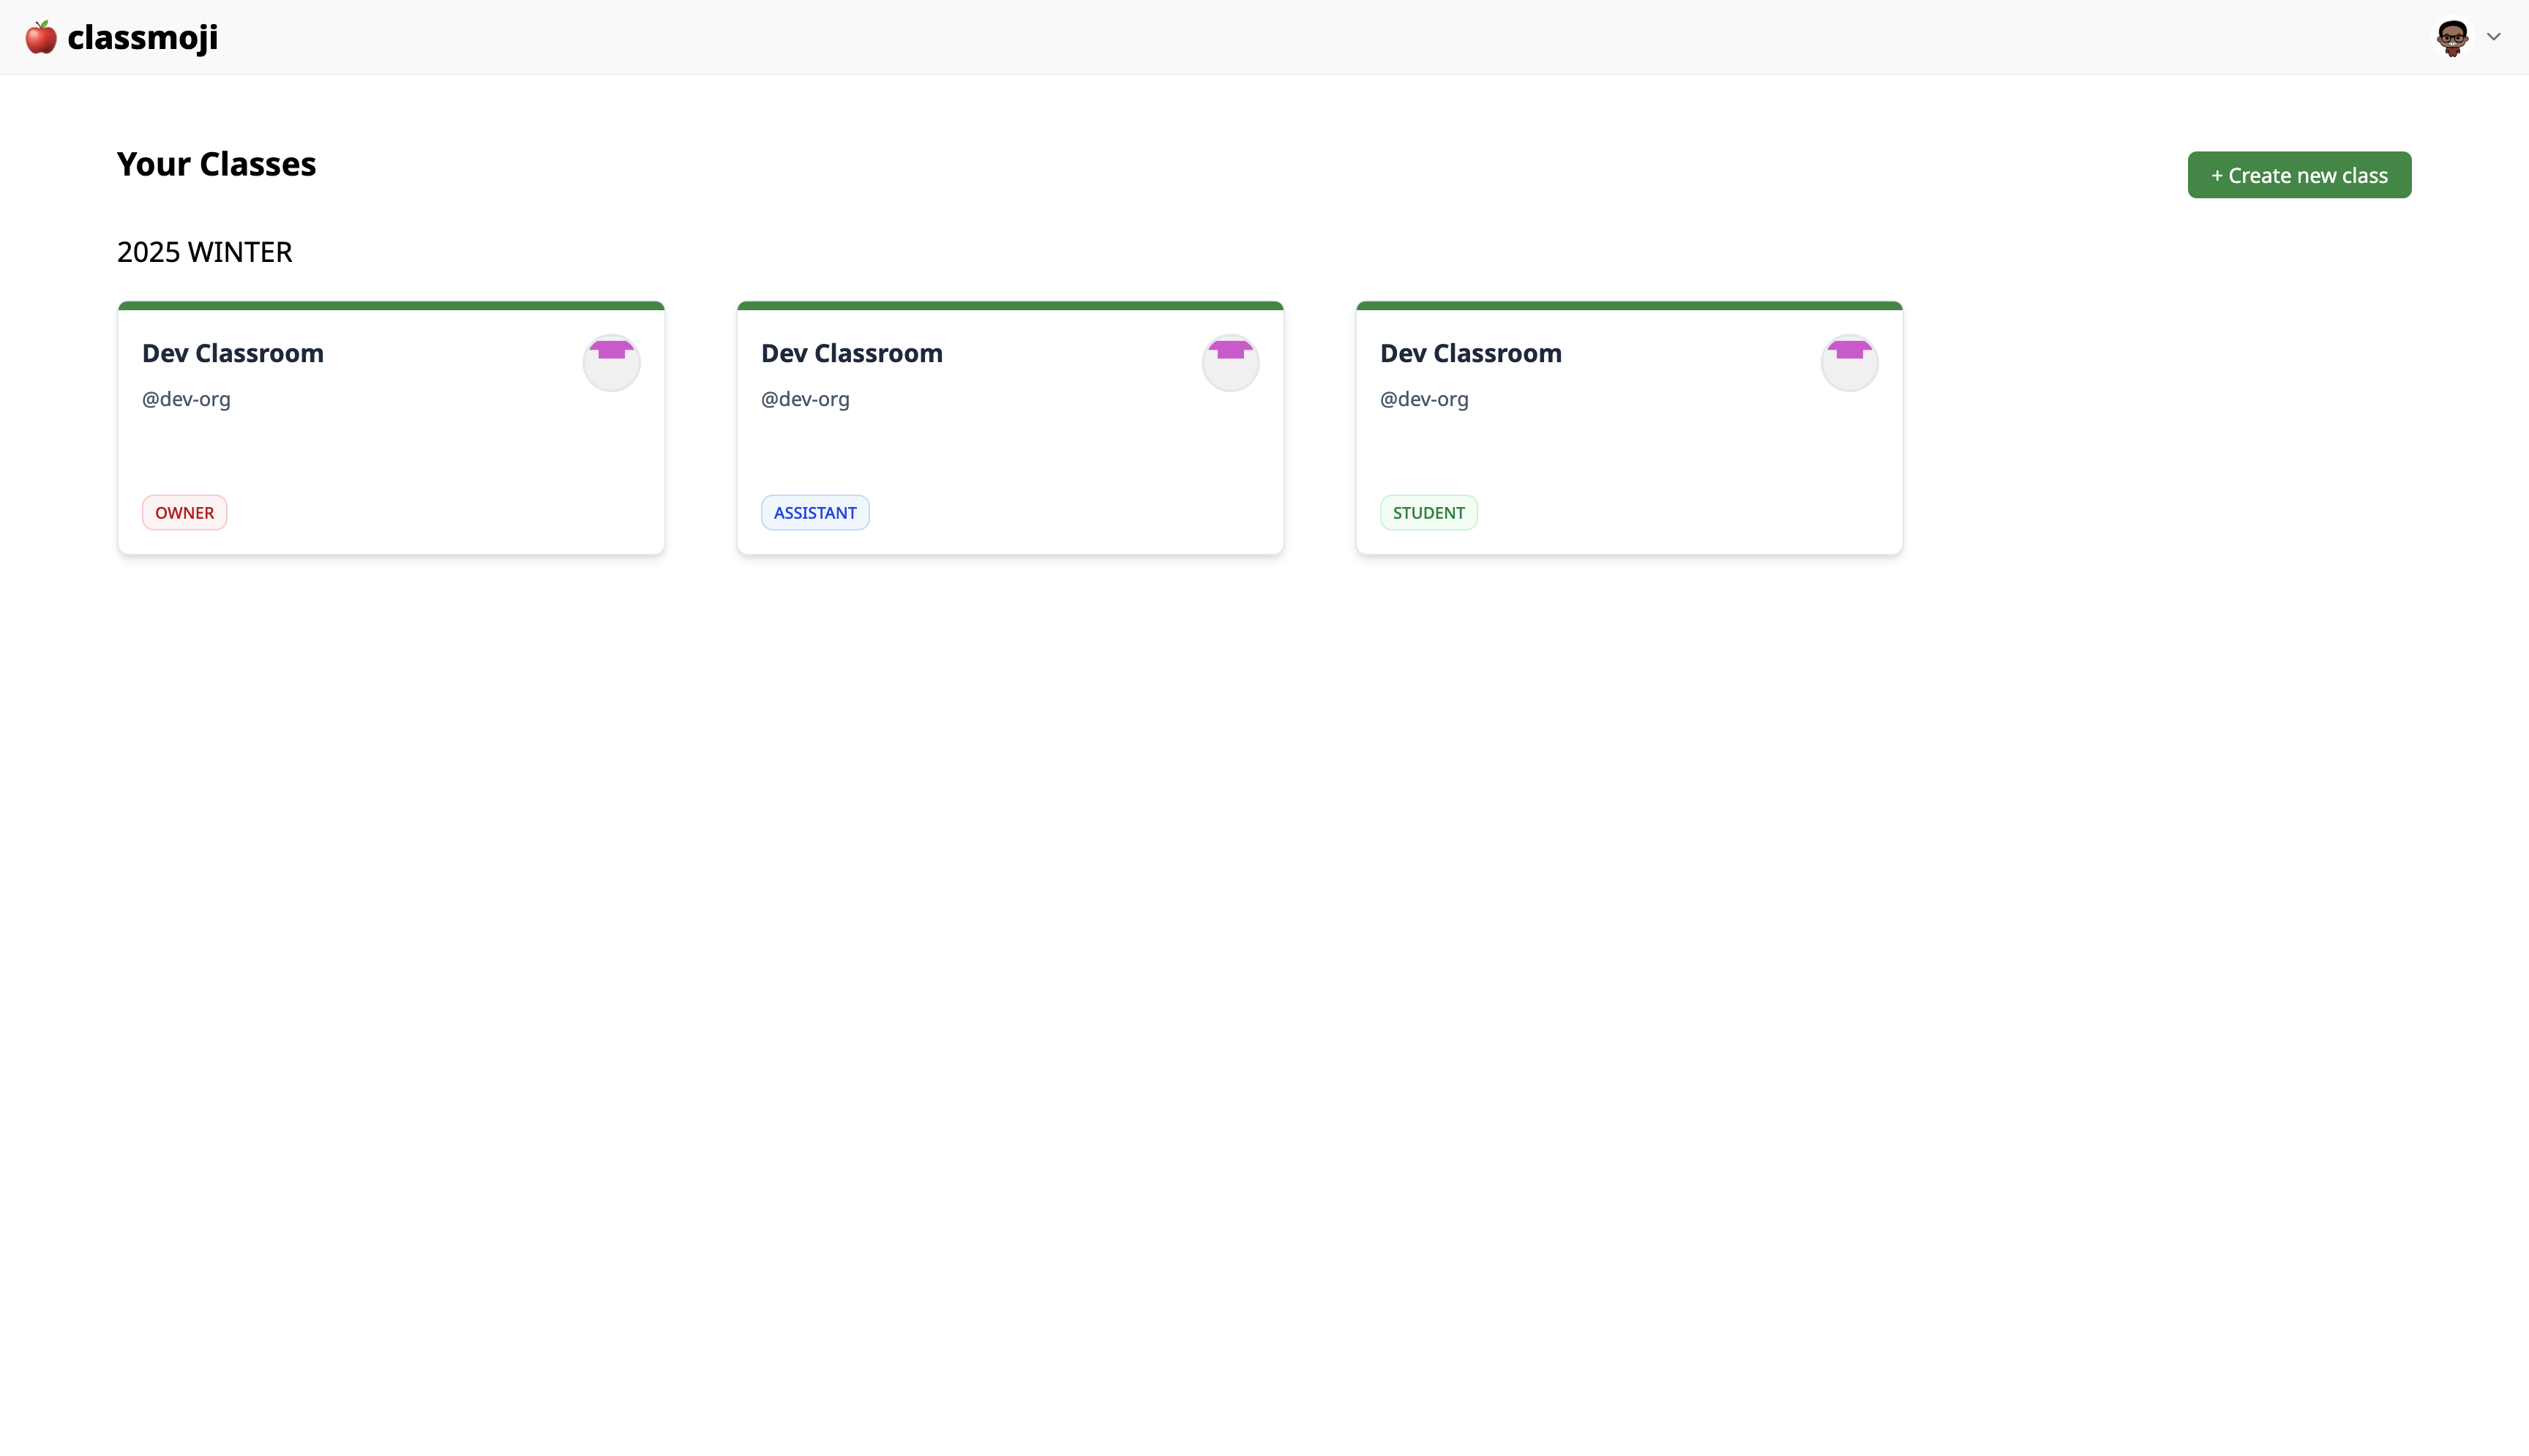
The organization, classroom, and student accounts shown are all seeded fake data — nothing connects to a real GitHub organization or real users.
What you can work on with this setup
Section titled “What you can work on with this setup”- UI changes — components, styles, dark mode, layouts
- Database schema changes and migrations
- Student, instructor, and TA views and workflows
- Grading, tokens, calendar, and modules
- Anything that doesn’t require real GitHub repositories or live webhooks
5. Full setup (optional)
Section titled “5. Full setup (optional)”Set up Trigger.dev
Section titled “Set up Trigger.dev”Trigger.dev is the background job runner Classmoji uses for tasks like repository creation and assignment setup. Its dashboard lets you see the status of jobs as they run locally.
- Sign up at trigger.dev and create a new project
- In the sidebar, make sure Development is selected as the environment
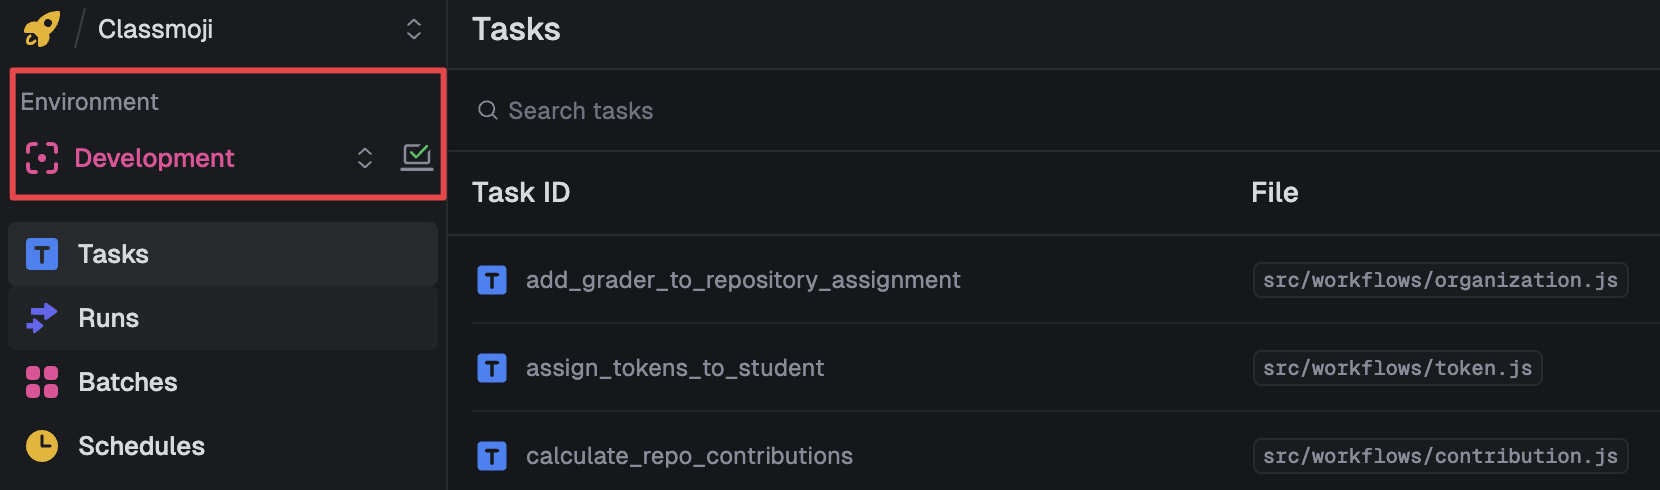
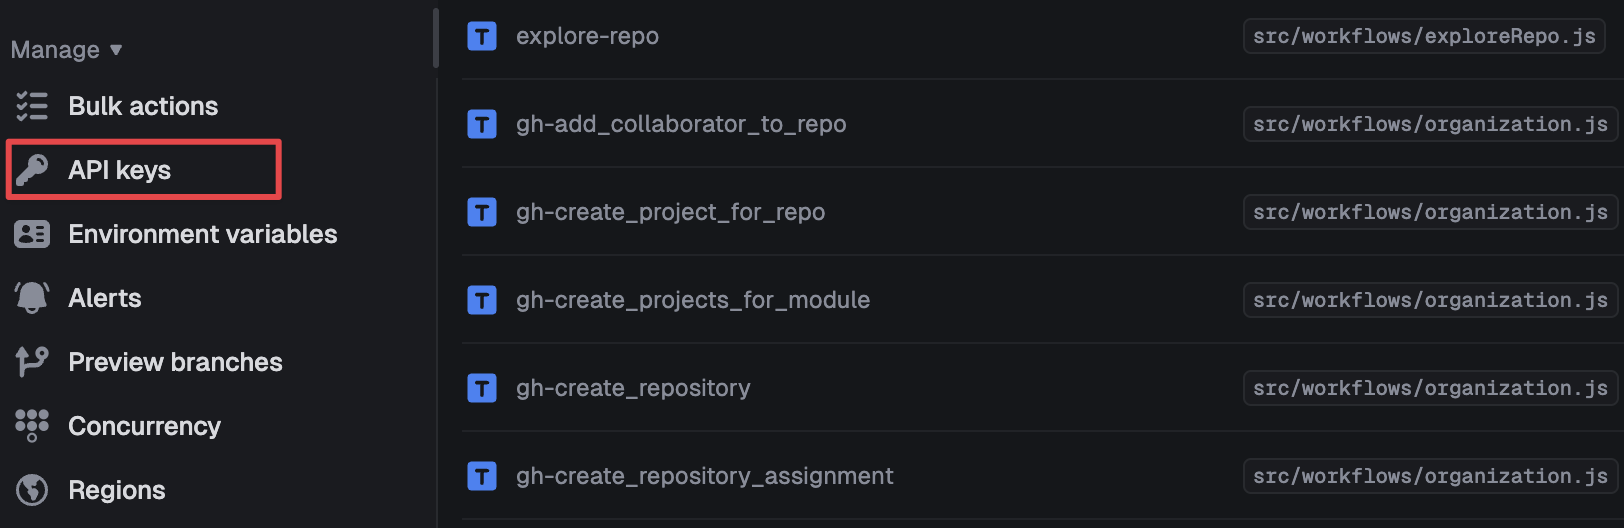
- Click API keys in the sidebar menu and copy your development key — it starts with
tr_dev_
- Add it to your
.env:
TRIGGER_SECRET_KEY="tr_dev_your-key-here"Set up the webhook tunnel
Section titled “Set up the webhook tunnel”GitHub needs a public URL to send webhook events to. But your local server isn’t reachable from the internet — that’s where Smee comes in.
Smee is a free webhook proxy. It gives you a public URL that receives events and forwards them to your local machine in real time.
- Go to smee.io/new — it’ll generate a unique channel URL for you (e.g.
https://smee.io/abc123) - Open apps/hook-station/package.json and replace the
hook:githubURL with your channel URL:
"hook:github": "smee -u https://smee.io/your-channel -p 4000 --path /webhooks/callback/github"- Go to your GitHub App settings at
https://github.com/settings/apps/YOUR_APP_NAME— replaceYOUR_APP_NAMEwith the value ofGITHUB_APP_NAMEin your.env. Set the Webhook URL to your Smee channel URL.
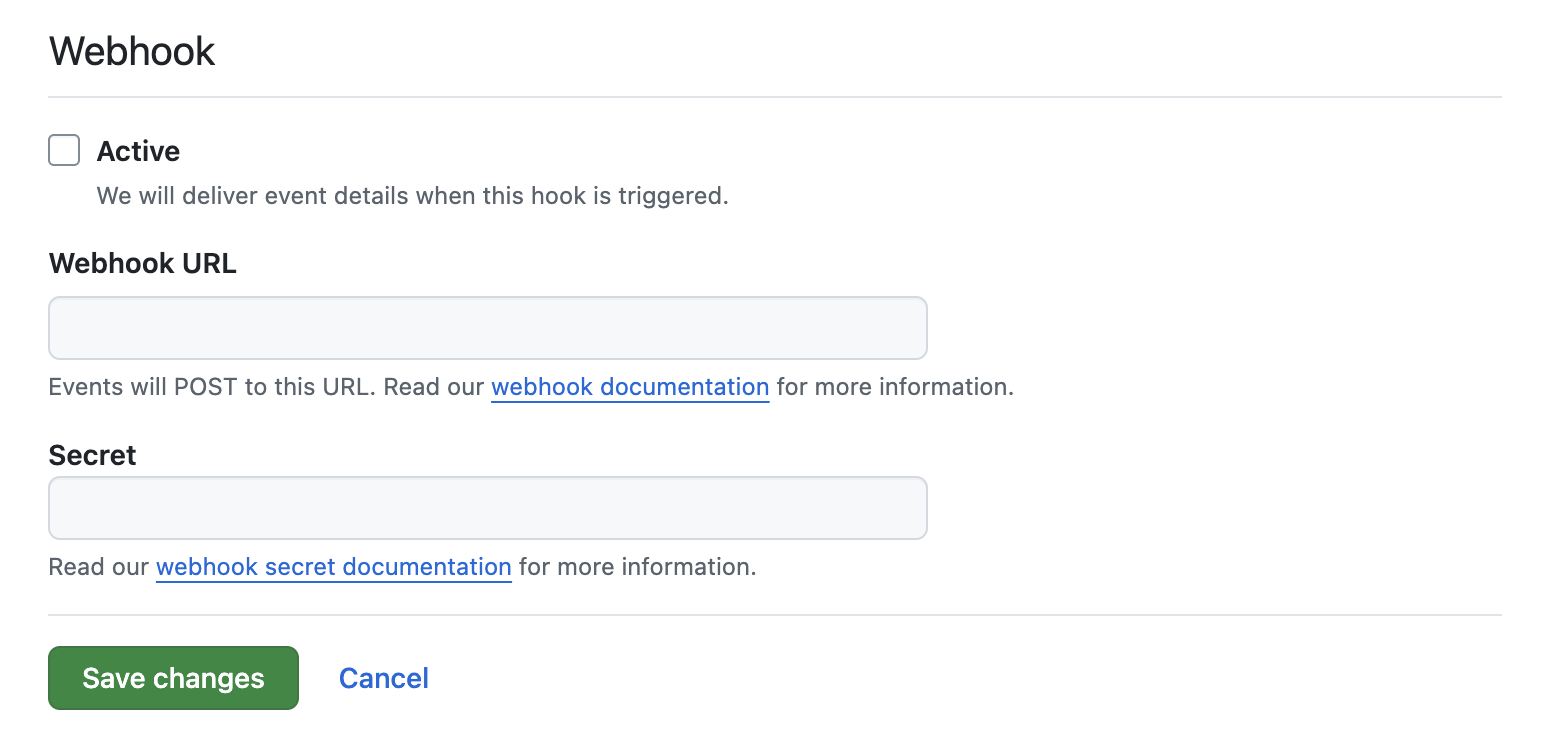
- Copy the value of
GITHUB_WEBHOOK_SECRETfrom your.envinto the Webhook secret field in the GitHub App settings.
Create a test GitHub organization
Section titled “Create a test GitHub organization”Before doing the steps below, make sure to stop running the webapp service and run:
npm run dev # starts all services: webapp, slides, pages, hook, Trigger.dev worker, and the Smee tunnel-
Create a free GitHub organization to use for testing.
-
Open
http://localhost:3000/select-organizationand click Create new class. -
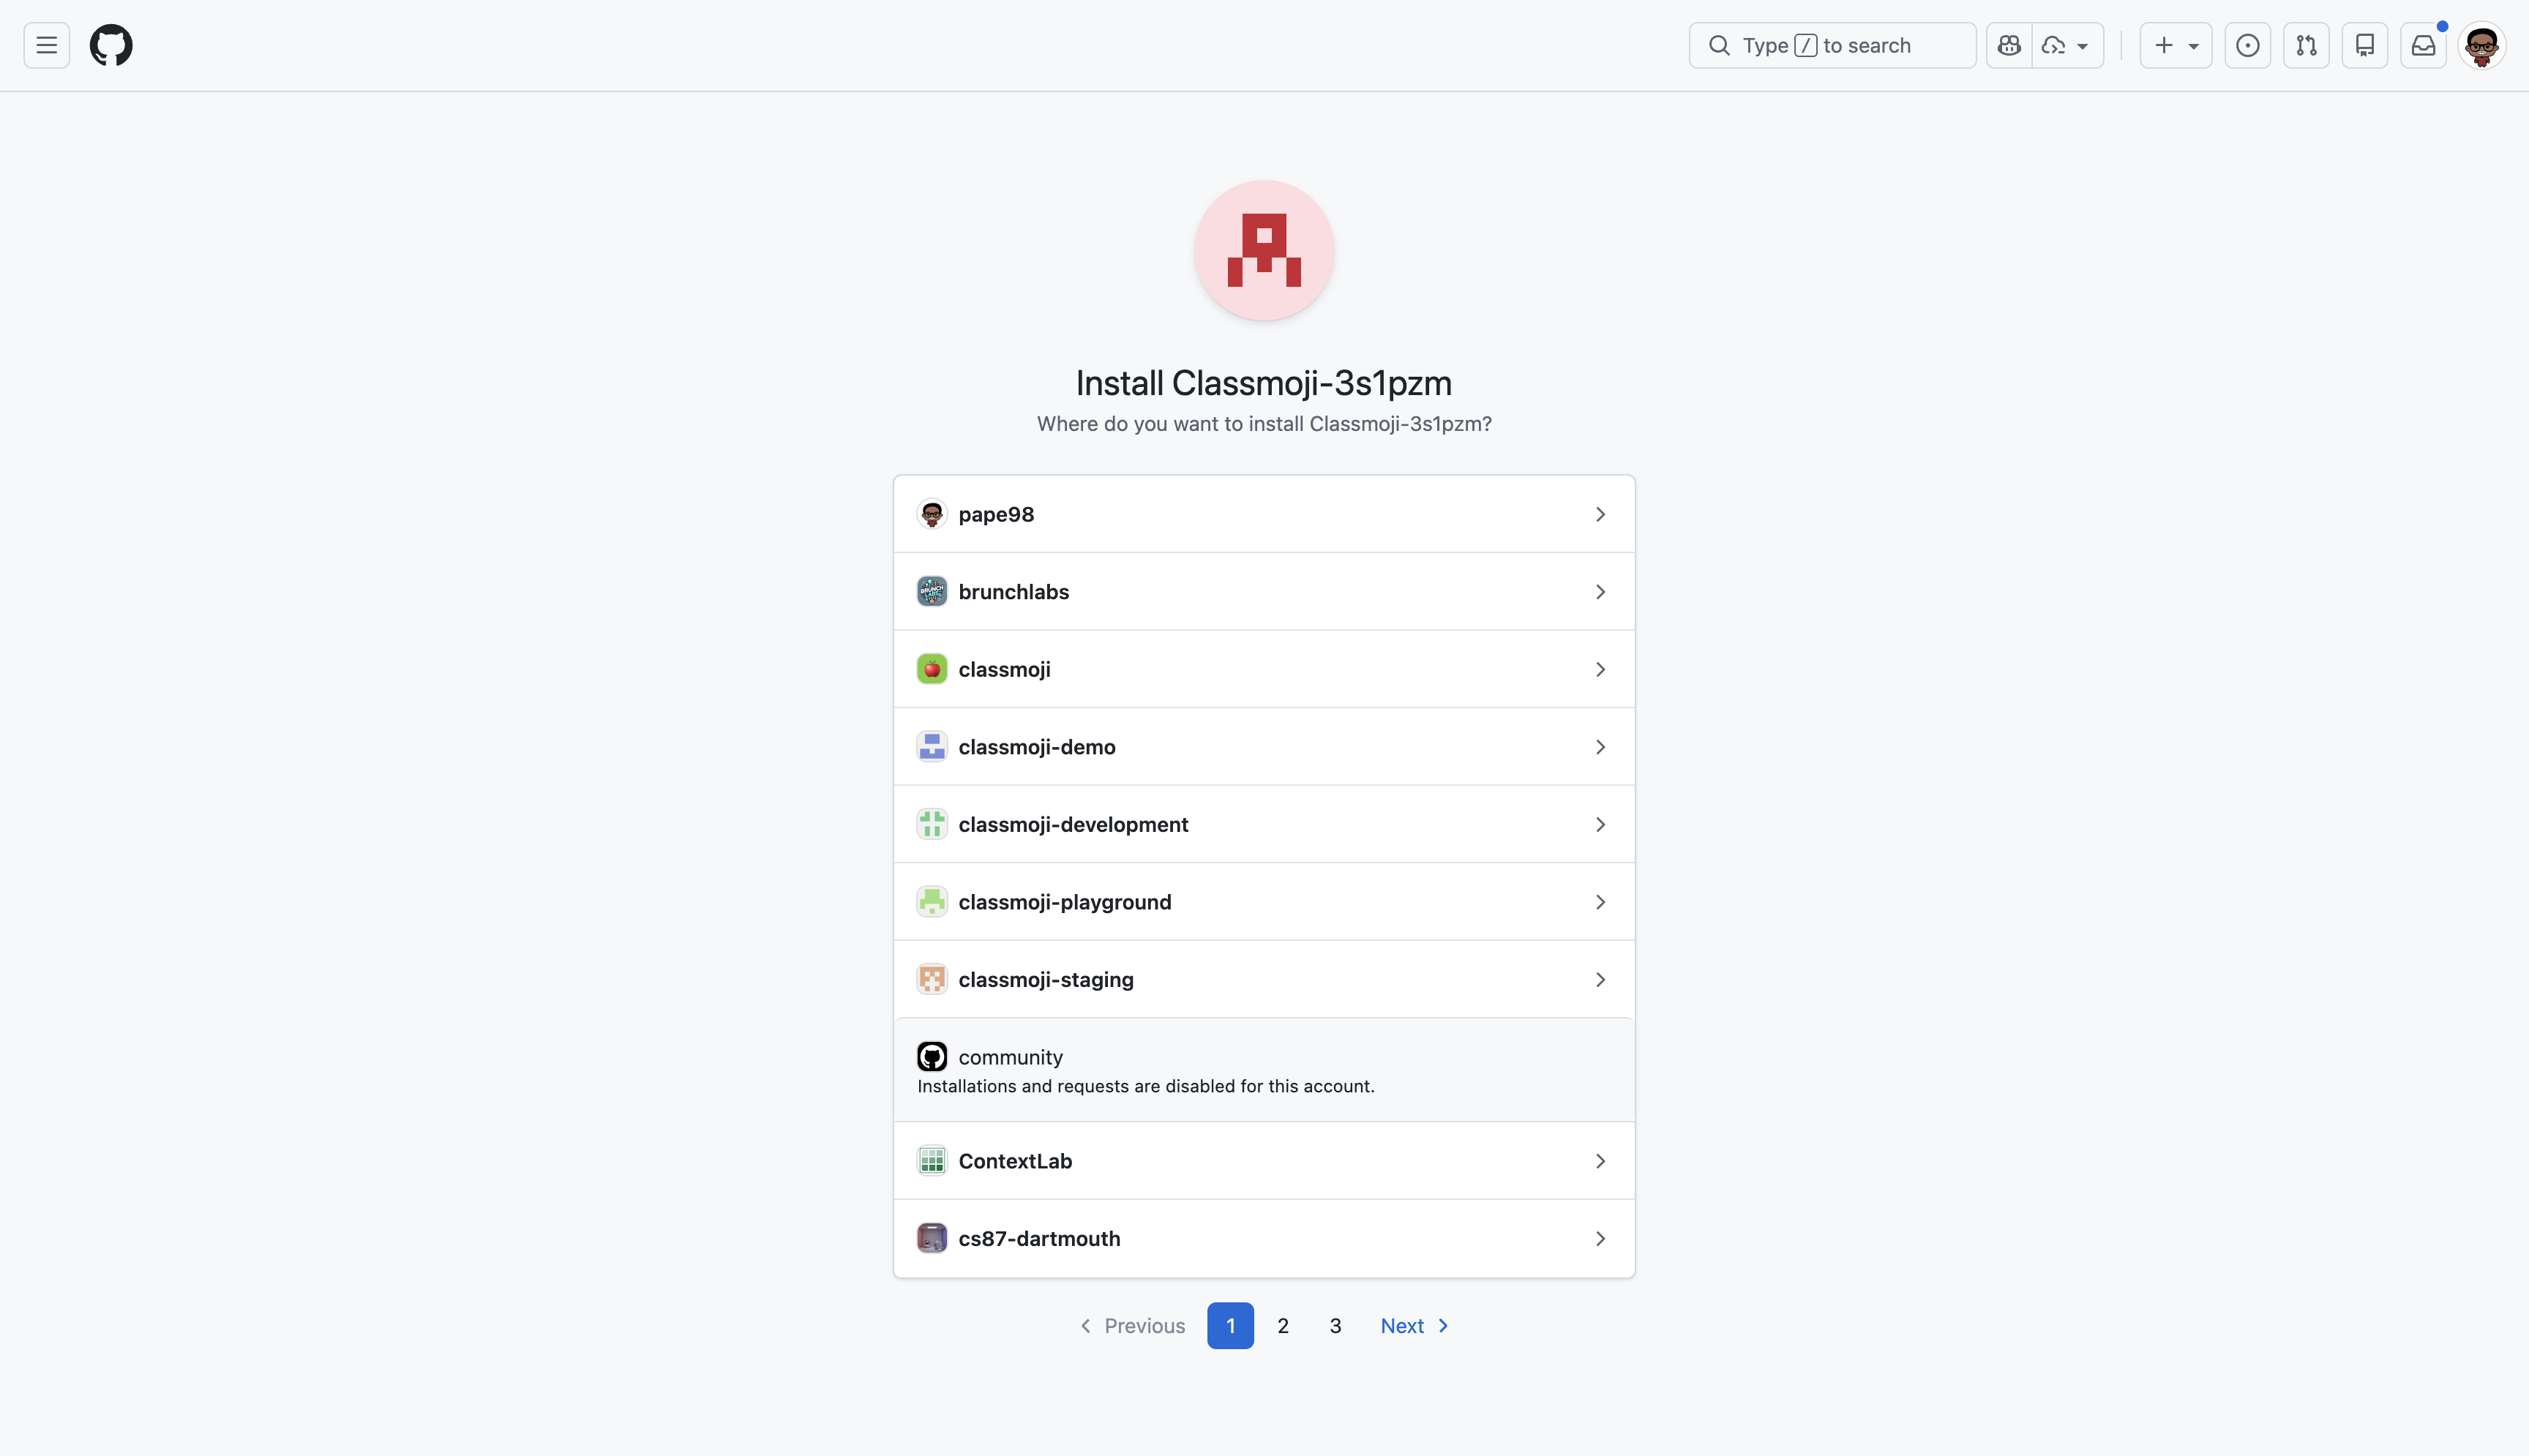
Click Install GitHub App on an organization. This will open a new window to install the GitHub App on your organization.
-
Select your organization and click Install and make sure to give it access to your repositories.
-
Follow the create a classroom guide to set up your first classroom. After that, you’re fully set up and ready to work on any part of the app.